Putting your Power BI Reports or Power BI Dashboards on a TV is easier than it sounds with RocketScreens. To make it even easier, we'll go through the steps together below.
In general, we will do the following:
- Perform OAuth with RocketScreens against Power BI.
- Create a Power BI App.
Option 1. The simple (and insecure) method
If you're already using the RocketScreens Professional Edition, continue to the next step.
The RocketScreens Standard Edition of RocketScreens, supports Power BI only when using a URL. These URLs are public, and are available to anyone who finds the URL. In addition, they can take a few seconds to load since they are hitting PowerBI each time and pulling back the report. If you're looking for something more secure and faster, you must upgrade to the RocketScreens Professional Edition.
To take a Public Power BI report and put it into RocketScreens, do the following:
- Navigate to Power BI Pro at app.powerbi.com.
- Navigate to your Report or Dashboard.
- Click File -> Embed Report -> Publish to web (public).
- A new window will open up, appearing similar to the below screenshot:

- Copy the URL value (the first field).
- Now, log into the RocketScreens CMS.
- Navigate to the Apps tab.
- Click the New App button.
- Search for Power BI.
- Select the app named Power BI URL.
- You will see a window as show below:
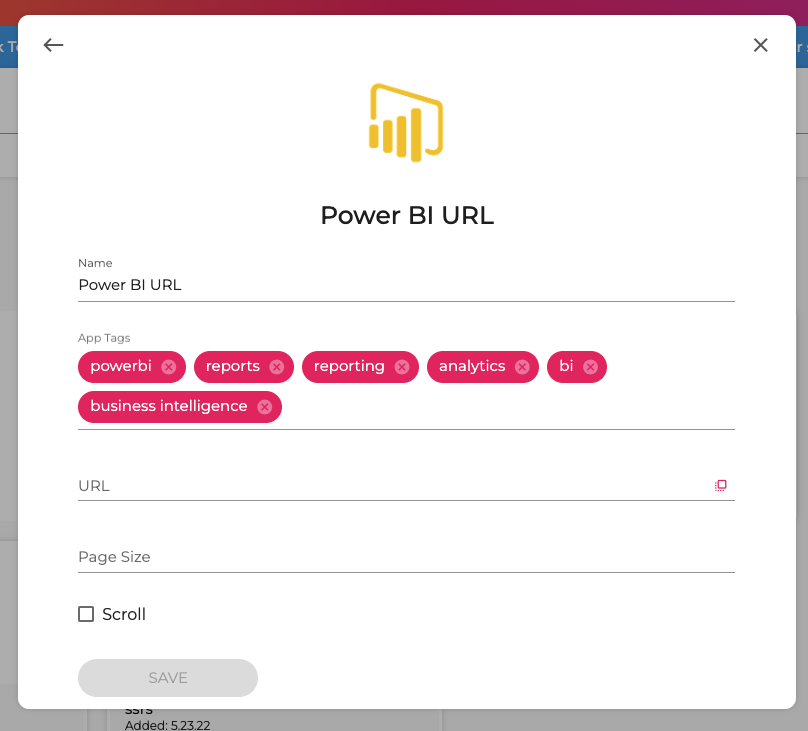
- Enter the provided Power BI URL in the URL field.
- Depending on the height of your Report or Dashboard, you may need to specify a Page Size.
- Click Save.
That's it! Clicking the preview icon will show you how your Power BI URL will show up on a TV.
From here, you can organize this App into a Channel and set up a TV. Not sure how to do that? Check out the other articles in our Knowledge Base!
Looking for an option that respects your security? Keep reading!
Option 2. Using the more secure methods
Login to Power BI with OAuth
Setup the PowerBI Integration. (1 time)
The first step to securely integrate RocketScreens with Power BI is to log in to your Power BI environment using OAuth. These steps only need to be performed once, at the initial setup. To get started:
- Navigate to the RocketScreens CMS.
- Go to the Integrations tab.
- Click the Add Integration button at the top right-hand corner of the page.
- Find the Power BI Integration, select it, and click the Sign in with Microsoft button.
- You will be prompted to login and accept a set of RocketScreens permissions, similar to the screen below
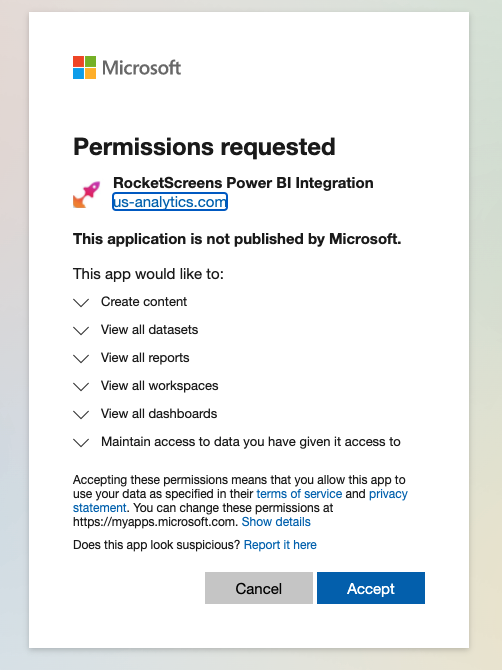
NOTE: If you instead arrive at a screen that reads RocketScreens is requesting one or more permissions that you are not authorized to grant, or RocketScreens needs permissions to access resources in your organization that only an admin can grant, or Approval Required, then you must contact your Office365 Admin for approval. See relevant docs here.
7. Click the blue Accept button.
8. RocketScreens will then tell you if everything worked out correctly.
Power BI and RocketScreens are now integrated! Now we can move on to pulling in some Power BI content!
Step 2. Create either a Power BI Reporting App or Power BI Dashboard App in RocketScreens or Both
With Step 1 complete, our last step is to select a Power BI Report or Dashboard to pull into RocketScreens. We can perform the following steps as often as needed for as many Dashboards or Reports as we like to connect. Each app will only connect to one report or dashboard.
Please note - that the RocketScreens PowerBI report application will not show dashboards and vice versa. If you have built reports in Microsoft PowerBI, use the RocketScreens Power BI reports application. The same goes for Dashboards. If you know that you have reports and RocketScreens connected to your instance and cannot see the dashboards, it's a good chance you have built reports and not dashboards. Try the other application to confirm that you can or cannot load up the proper report or dashboard.
Follow the below steps:
- Navigate to the RocketScreens CMS.
- Navigate to the Apps tab.
- Click the New App button.
- Search for Power BI.
- Select the app named Power BI Report or Power BI Dashboard. Note: (Power BI Live is described below.)
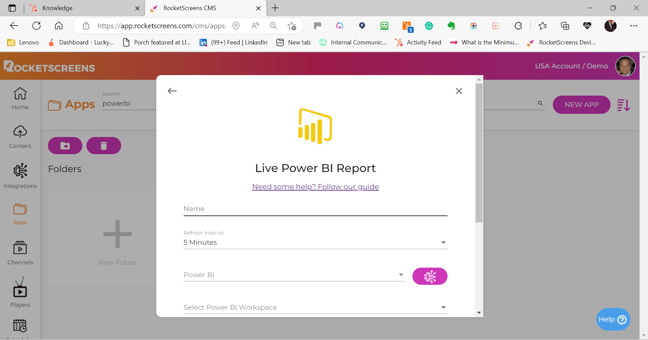
- You will see a window as shown below:

- Select the newly created Power BI Integration next to the purple integration icon.
- Select the Workspace.
- Select the Report or Dashboard.
- Click the Save button.
And that's it! The Dashboard or Report may take a moment to render, but clicking the preview icon will show you how your content will show up on a TV. You can also create as many Reports or Dashboards as you like!
Step 2. Create a Power BI Live App
You can repeat the Step one directions but choose the Power BI Live Application to connect to PowerBI for the need to see a live report. This application should be used only if the report or dashboard needs to be in an actual live state.
The experience of using this application will take a few seconds to load, so this dashboard should be shown on the screen for an extended period. It also taxes the Microsoft instance, and it is possible that could impact your licensing with Microsoft. Please check with your PowerBI user guide to determine if this could negatively affect the cost of Microsoft.
Most users find this App unnecessary, and the other two Power BI RocketScreens applications will work instead.
From here, you can organize this App into a Channel and set up a TV. Not sure how to do that? Check out the other articles in our Knowledge Base!
Still not working as expected? Review the above steps for accuracy, or contact us at support@rocketscreens.com.