NOTE: This feature is currently in beta. The functionality and availability of this feature may change in the future. Any questions of the availability of this feature should be directed to sales@rocketscreens.com.
Introduction
RocketScreens enables customers to send events from Salesforce to their screens in realtime. For example, a Closed Won Opportunity can be sent to your screens to celebrate the sale and congratulate the salesperson involved. This gamification builds friendly competition in your team and makes them strive to outperform one another, leading to better performance.
This document will walk you through the process of setting up a Salesforce Events App. Please note, Opportunities are the only currently supported objects to send to RocketScreens. If you have other events you would like to send, please let us know at support@rocketscreens.com. We would love to hear your use-case!
Step 1. Create Salesforce Events App in RocketScreens
First, let's get RocketScreens ready for the integration.
- Go to the RocketScreens Apps tab.
- Click the New App button.
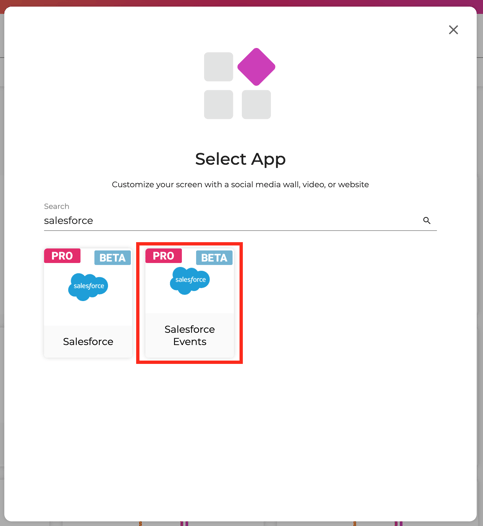
- Search for "Salesforce" and select the Salesforce Events App.
- In the next window, copy the Outbound Message URL field. We will need this later.
- Select the Event Type field (in this case, we will select the "Closed Won" event).
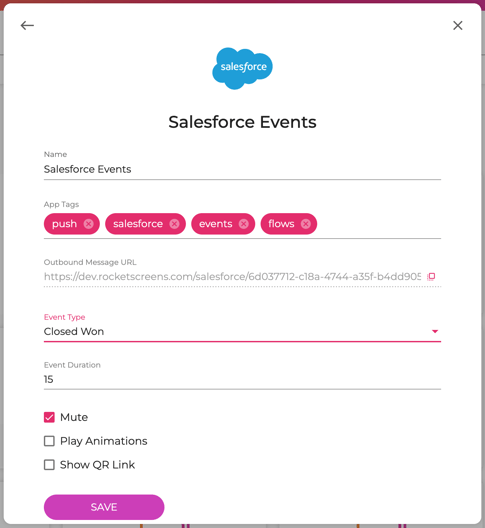
- Set an Event Duration, which is how long we want each event to show (there could be multiple events delivered at any time).
- Some other options we may consider:
- Mute: A new event can play audio when it first shows up on a screen. Enable this option to not play the audio.
- Play Animations: A new event will also throw out some confetti as some fanfare. Depending on the hardware, this could be very impactful on the system, so it may make sense to disable it.
- Show QR Link: Show a QR code which will link back to the opportunity.
- Click the Save button.
- Add this App to any Channel you desire.
Once we have an App created, we can start configuring Salesforce.
Step 2. Create an Outbound Message in Salesforce
Now, let's set up an Outbound Message in Salesforce. This will tell Salesforce how to talk to the RocketScreens system. You'll need to be an Administrator to complete this step.
- Go to Setup in Salesforce.
- Find or Search for Outbound Messages. The one we want is Process Automation -> Workflow Actions -> Outbound Messages.
- Click the New Outbound Message button.
- In the first step, select the Opportunity object.
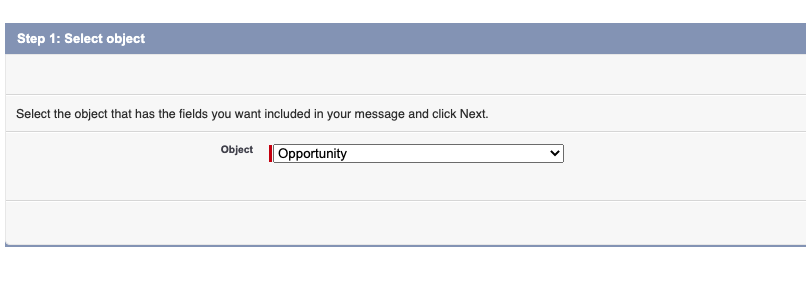
- Click Next.
- In the second step, we need to provide a few values:
- Name: Name the Outbound Message something which is easily recognizable with RocketScreens. In our example, we will name it "RS Example".
- Endpoint URL: Paste the copied URL provided by RocketScreens into this field.
- User to send as: Select a User which has permissions to read the Opportunity, Account, and Owner details. Otherwise RocketScreens may not be able to access all of the properties required to display the Opportunity.
- Send Session ID: This option must be enabled.
- Opportunity fields to send: The only required field is Id.
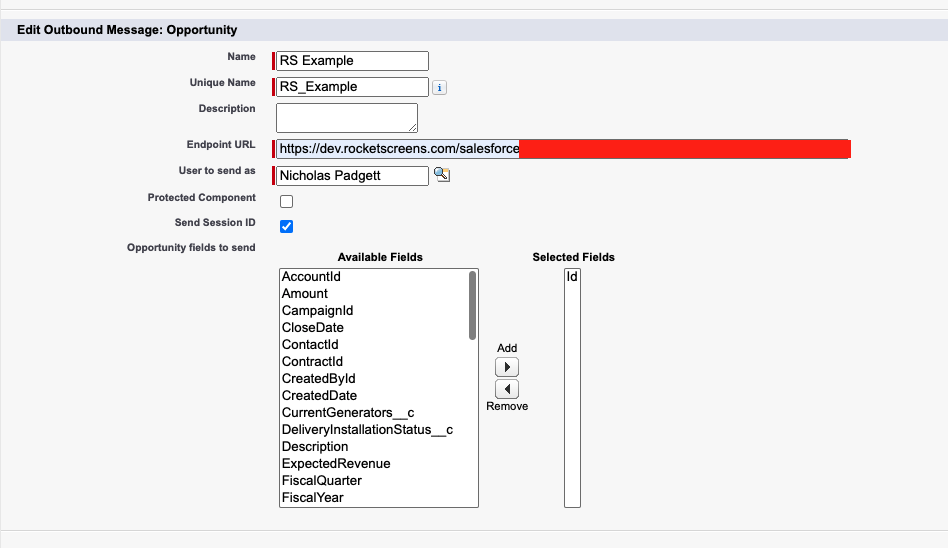
- Click Save.
Salesforce now knows how to send messages to RocketScreens, but how does it know when to send a message? We will set up Triggers for that in the next step.
Step 3. Create Triggers in Salesforce
In order for Salesforce to notify RocketScreens of events, we have to set up a Trigger in Salesforce.
- Go to Setup.
- Go to Process Automation -> Flows.
- Click the New Flow button.
- In the next window, select Record-Triggered Flow.
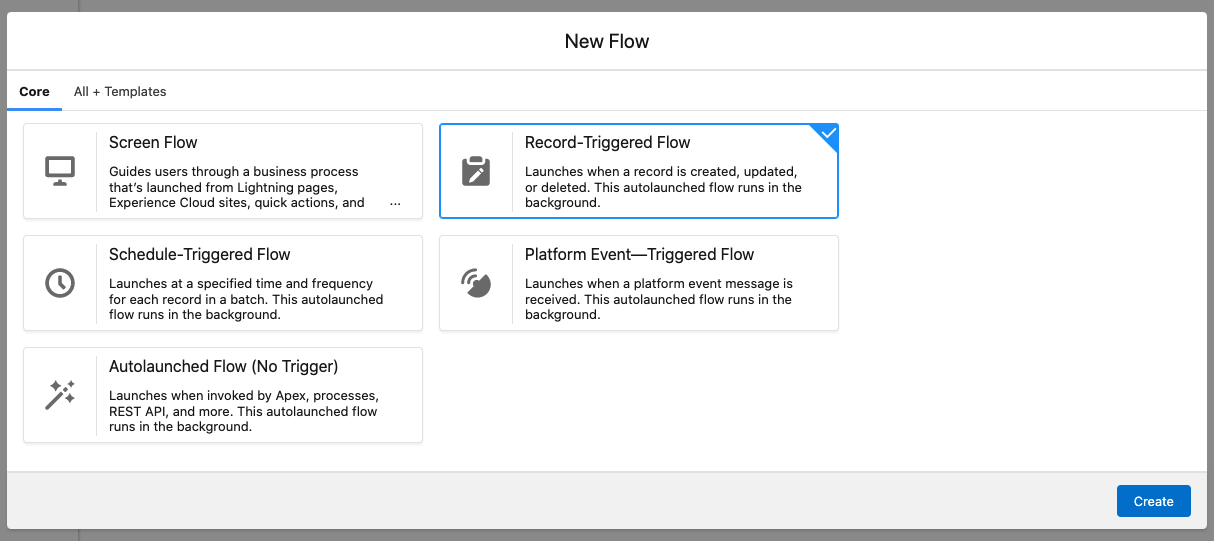
- Click the Create button.
- A new window will open with several options. Let's walk through each of these options.
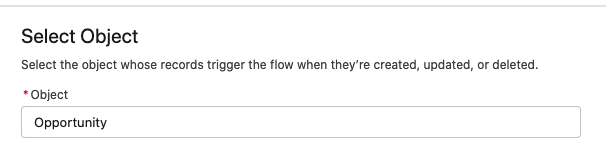
- Select Object: Select the "Opportunity" value.
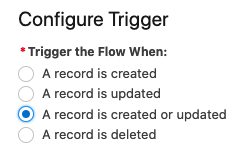
- Configure Trigger: Here you can configure which events will fire the trigger. Since we're wanting to handle Closed Won Opportunities, let's select "A record is created or updated".
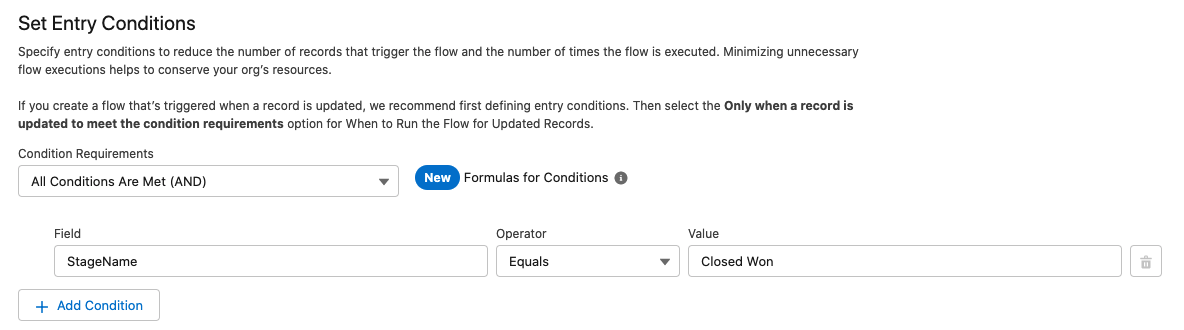
- Set Entry Conditions: This option is where most of the work will go. We need to define a set of conditions on when to send the trigger. In this example we will create a condition for when the StageName equals Closed Won. Feel free to add as many conditions as you like.
- When to Run the Flow for Updated Records: In order to remove duplicate notifications for the same event, you'll want to select the option reading Only when a record is updated to meet the condition requirements.

- Optimize the Flow for: Select Actions and Related Records.

- Select Object: Select the "Opportunity" value.
- Click Done.
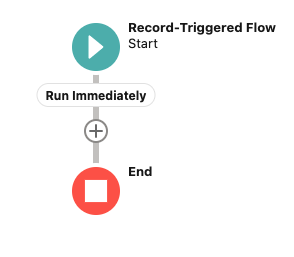
- We should now see a Flow layout with the Trigger we just created. The final series of steps is hooking up an action to this event.
- Click the plus icon in the chain of events in the flow.
- In the new menu which opens, find the Interaction section. Select the Action option.
- The New Action window will open.
- In the list of categories on the left, find the Outbound Message option.
- Search for the Outbound Message we created in the Action field. In our case, we're searching for "RS Example".
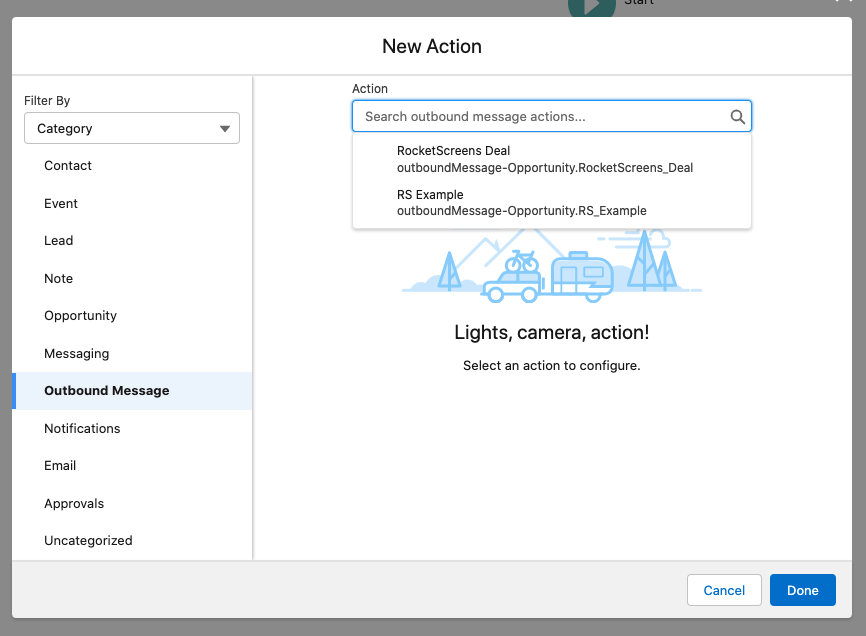
- Click Done.
- The resulting Flow should appear similar to the below screenshot:
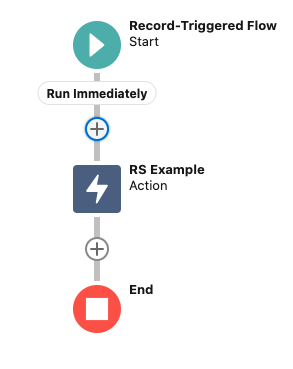
- Please note, the Run button will not work (it is not supported for Trigger Flows). This is normal and expected.
- Finally, click the Save button. Name the Flow something easily recognizable as RocketScreens. Click Save.
- Finally, select the Activate button.
That's it! The Opportunities which meet your criteria will be sent to RocketScreens and displayed on your screens!
Conclusion
As the Salesforce Events come into RocketScreens, there's a few things that will happen. The first is the events will be shown during their normal playtime during a Channel. This is just like any normal App.
Additionally, when a new event comes in to RocketScreens, your Player will skip to the Salesforce Events App and show the new events immediately.