Pre-requisites
Before starting, ensure the following are in place:
- Access to a Jira dashboard (admin or shared access)
- A dedicated Atlassian user account for RocketScreens
- Multi-factor authentication (MFA) enabled on that account using an authenticator app
Jira dashboard shared with the RocketScreens user
Step 1: Create a Dedicated Atlassian User
You need a separate account in **Atlassian specifically for RocketScreens.
Create User via Atlassian Admin
- Go to: https://admin.atlassian.com
- Select your organization
- Navigate to:
Directory → Users - Click:
Invite users - Enter:
- Email: rocketscreens(or similar)@yourcompany.com
- Name: RocketScreens (or similar identifier)
- Assign product access:
Select Jira Software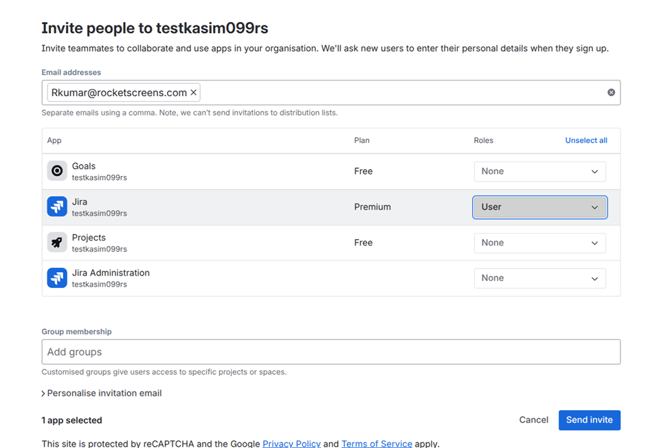
- Send invite
- Complete setup:
- Open the invite email
- Set password
- Log in once to activate account
Access & Permission Setup (Critical)
After user creation:
- Add user to appropriate group:
- jira-software-users (minimum requirement)
- Ensure:
- Access to Jira site, dashboards and filters
- Open the dashboard and explicitly:
- Share with the RocketScreens user (or group)
Step 2: Enable MFA for the Atlassian User
MFA is mandatory for this setup.
Use any authenticator app:
- Google Authenticator / Microsoft Authenticator / Authy / 1Password
During setup, Atlassian will display:
- QR code
- Manual setup key (important)

Step 3: Capture the TOTP Secret
This is a critical step.
RocketScreens requires the manual setup key (TOTP secret) — not the 6-digit
How to get it
- Start MFA setup
- On the QR screen, click:
- “Can’t scan it?”
- “Enter setup key”
- “Manual setup"
- Copy the long secret key
- Store it securely
- Complete MFA setup

Important Notes
- This is a Base32 string (example: JBCDE3FGHHPK3PXP)
- Not recoverable later from most authenticator apps
If already configured:
- Disable MFA
- Reconfigure it
- Capture the secret during setup
Step 4: Validate Jira Dashboard Readiness
Before integration, confirm:
- RocketScreens user can access it directly
- All gadgets and filters are visible
- Layout is suitable for TV display
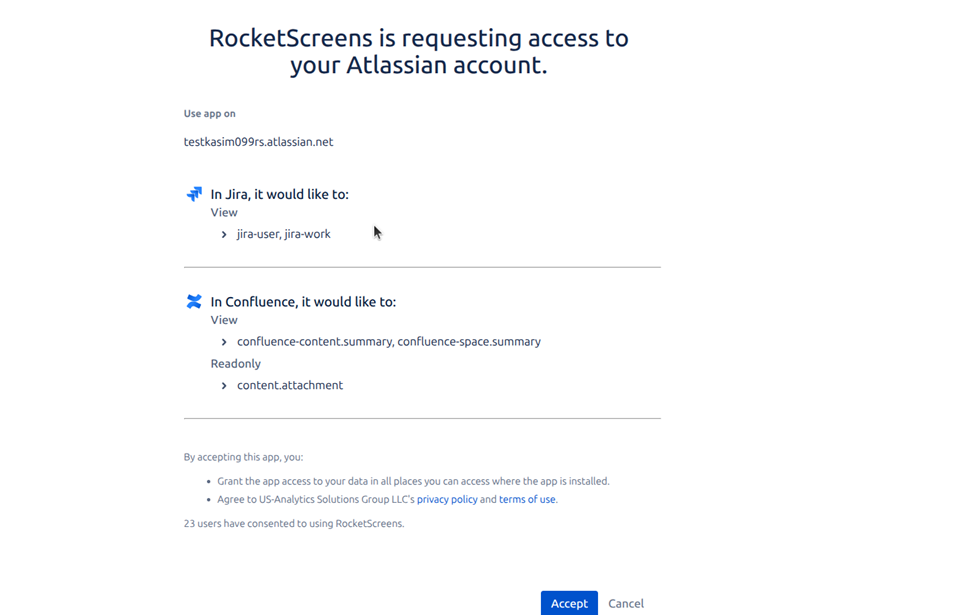
Step 5: Add Atlassian Integration in RocketScreens
- Log in to RocketScreens CMS
- Navigate to: Integrations
- Click: New Integration
- Select: Atlassian
- Complete authorization
- Log in using the dedicated Atlassian user
- Approve access
Step 6: Create a Jira Dashboard App
- Go to: Apps
- Click: New App
- Search: Jira Dashboard
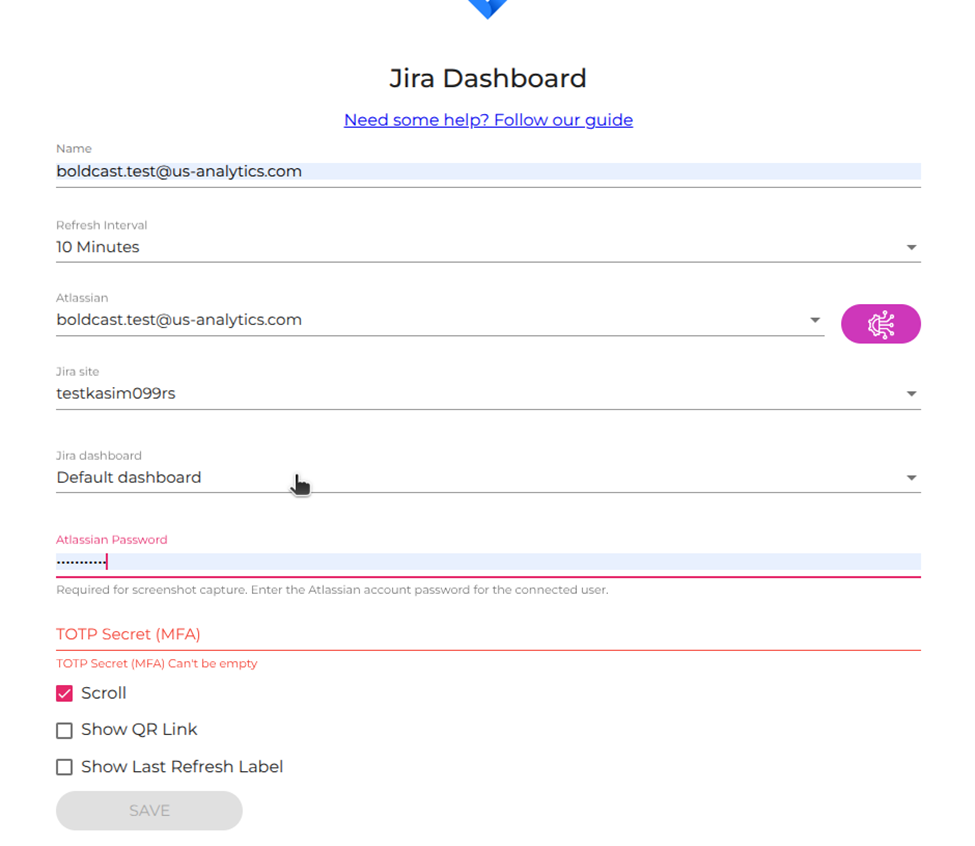
Configuration Fields
- Name
Example: Engineering Jira Dashboard - Refresh Interval
Example: 10 Minutes - Atlassian
Select your integration - Jira Site
Choose correct instance - Jira Dashboard
Select target dashboard - Atlassian Password
Password of the dedicated user - TOTP Secret (MFA)
Enter Base32 secret from Step 3 - Scroll
Enable if dashboard exceeds screen height - Show QR Link
Optional
Click Save
Step 7: Assign the App to a Channel
- Navigate to: Channels
- Open target channel
- Add the Jira Dashboard app
- Save changes
Dashboard will now render on the assigned screen and refresh automatically.
Troubleshooting
If the dashboard fails to display:
- Validate user access via manual login
- Recheck password accuracy
- Ensure correct TOTP secret (not 6-digit code)
- Confirm MFA is via authenticator app (not SMS)
- Check dashboard sharing permissions